How to Dye Hair with Kool-Aid: A Step-by-Step Guide for Temporary Hair Color
Dyeing hair with Kool-Aid has become a popular trend for those looking to experiment with vibrant, temporary hair colors. This article provides a comprehensive guide on how to dye your hair with Kool-Aid, including step-by-step instructions and tips for achieving the best results. Whether you want to add a pop of color to your look for a special occasion or simply have some fun, this method offers a temporary and affordable option.
1. Gather Your Supplies:
To begin the process of dyeing your hair with Kool-Aid, gather the necessary supplies. Here's a checklist:
- Unsweetened Kool-Aid packets (2-3 for short hair, 4-5 for medium hair, 6-8 for long hair)
- Bowl
- Boiling water
- Stirring spoon
- Plastic gloves
- Petroleum jelly
- Hair clips
- Aluminum foil or plastic wrap
- Towel
2. Choose the Right Kool-Aid Flavor:
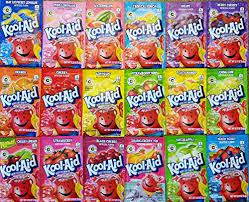
Choose the Right Kool-Aid Flavo
Select a Kool-Aid flavor that matches the color you desire for your hair. Keep in mind that Kool-Aid colors tend to be bright and vibrant, so choose accordingly. Here are some popular flavors and their corresponding colors:
- Cherry: Deep red
- Blue Raspberry: Bright blue
- Grape: Rich purple
- Orange: Vibrant orange
- Lemonade: Sunny yellow
3. Prepare the Kool-Aid Mixture:
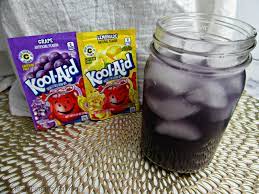
How to dye hair with kool aid
In a bowl, mix the Kool-Aid packets with a small amount of boiling water. Stir until the Kool-Aid crystals dissolve completely. Adjust the water amount to achieve your preferred consistency, whether thicker or thinner.
4. Protect Your Skin:
Before applying the Kool-Aid mixture, it's important to protect your skin from staining. Apply a thin layer of petroleum jelly along your hairline, neck, and ears. This will make the cleanup process easier and prevent unwanted color on your skin.
5. Section Your Hair:
Divide your hair into small sections using hair clips. This step helps ensure an even distribution of color and prevents any missed spots.
6. Apply the Kool-Aid Mixture:
Put on the plastic gloves to avoid staining your hands. Dip your fingertips into the Kool-Aid mixture and apply it directly to each hair section, starting from the roots and working your way to the tips. Ensure that each strand is saturated with the Kool-Aid mixture.
7. Wrap the Hair:
Once you've applied the Kool-Aid mixture to a section, wrap it in aluminum foil or plastic wrap. This step helps prevent the color from transferring onto other strands and keeps the dye in place. Repeat this process for each section of hair.
8. Let the Color Set:
Allow the Kool-Aid to set in your hair for at least 2-3 hours. For more intense color, you can leave it on overnight. To avoid color transfer, you can wrap your hair in a towel or wear a shower cap.
9. Rinse and Dry:
After the desired time has passed, rinse your hair with cool water until the water runs clear. Avoid using shampoo or conditioner during this step, as it may wash out the color. Gently pat your hair dry with a towel.
Dyeing hair with Kool-Aid offers a fun and temporary way to experiment with vibrant hair colors. By following these step-by-step instructions, you can achieve the desired temporary hair color using easily accessible supplies. Remember, Kool-Aid hair dye is temporary and will fade with each wash. Enjoy your colorful hair and have fun exploring different shades with this creative and affordable method!